Download PTV Vector Map style
PTV provides two styles for the PTV Vector Map:
To use your preferred style with Maputnik, you have to download the style and insert your API key to the sources section:
 "sources": {
        "ptv": {
            "type": "vector",
            "tiles": [
                "https://api.myptv.com/maps/v1/vector-tiles/{z}/{x}/{y}?apiKey=YOUR_API_KEY"
            ],
            "attribution": "© 2024 PTV Group, HERE",
            "minzoom": 0,
            "maxzoom": 17
        },
        "ptv-overlays-tr": {
            "type": "vector",
            "tiles": [
                "https://api.myptv.com/maps/overlays/v1/vector-tiles/{z}/{x}/{y}?layers=truckRestrictions&apiKey=YOUR_API_KEY"
            ],
            "attribution": "© 2024 PTV Group, HERE",
            "minzoom": 9,
            "maxzoom": 17
        },
        "ptv-overlays-tp": {
            "type": "vector",
            "tiles": [
                "https://api.myptv.com/maps/overlays/v1/vector-tiles/{z}/{x}/{y}?layers=trafficPatterns&apiKey=YOUR_API_KEY"
            ],
            "attribution": "© 2024 PTV Group, HERE",
            "minzoom": 9,
            "maxzoom": 17
        },
        "ptv-overlays-lez": {
            "type": "vector",
            "tiles": [
                "https://api.myptv.com/maps/overlays/v1/vector-tiles/{z}/{x}/{y}?layers=lowEmissionZones&apiKey=YOUR_API_KEY"
            ],
            "attribution": "© 2024 PTV Group, HERE",
            "minzoom": 9,
            "maxzoom": 17
        },
        "ptv-overlays-toll": {
            "type": "vector",
            "tiles": [
                "https://api.myptv.com/maps/overlays/v1/vector-tiles/{z}/{x}/{y}?layers=toll&apiKey=YOUR_API_KEY"
            ],
            "attribution": "© 2024 PTV Group, HERE",
            "minzoom": 9,
            "maxzoom": 17
        },
        "ptv-overlays-ti": {
            "type": "raster",
            "tiles": [
                "https://api.myptv.com/rastermaps/v1/image-tiles/{z}/{x}/{y}?layers=trafficIncidents&apiKey=YOUR_API_KEY"
            ],
            "tileSize": 256,
            "attribution": "© 2024 PTV Group, HERE",
            "minzoom": 9,
            "maxzoom": 17
        }
    }
Import the style into Maputnik
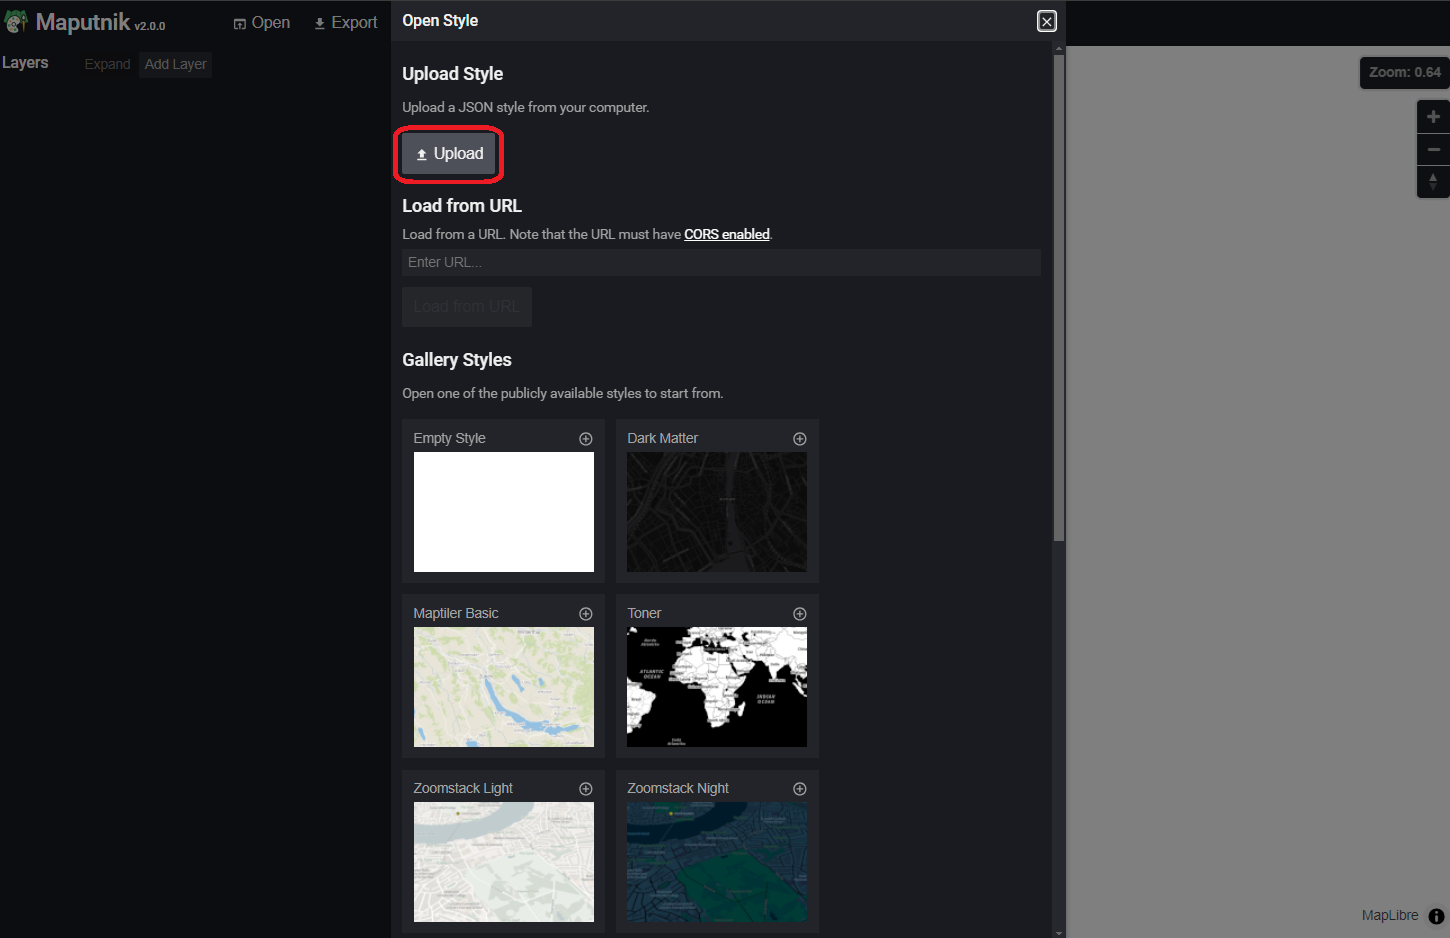
Open maputnik and click Open -> Upload Style:
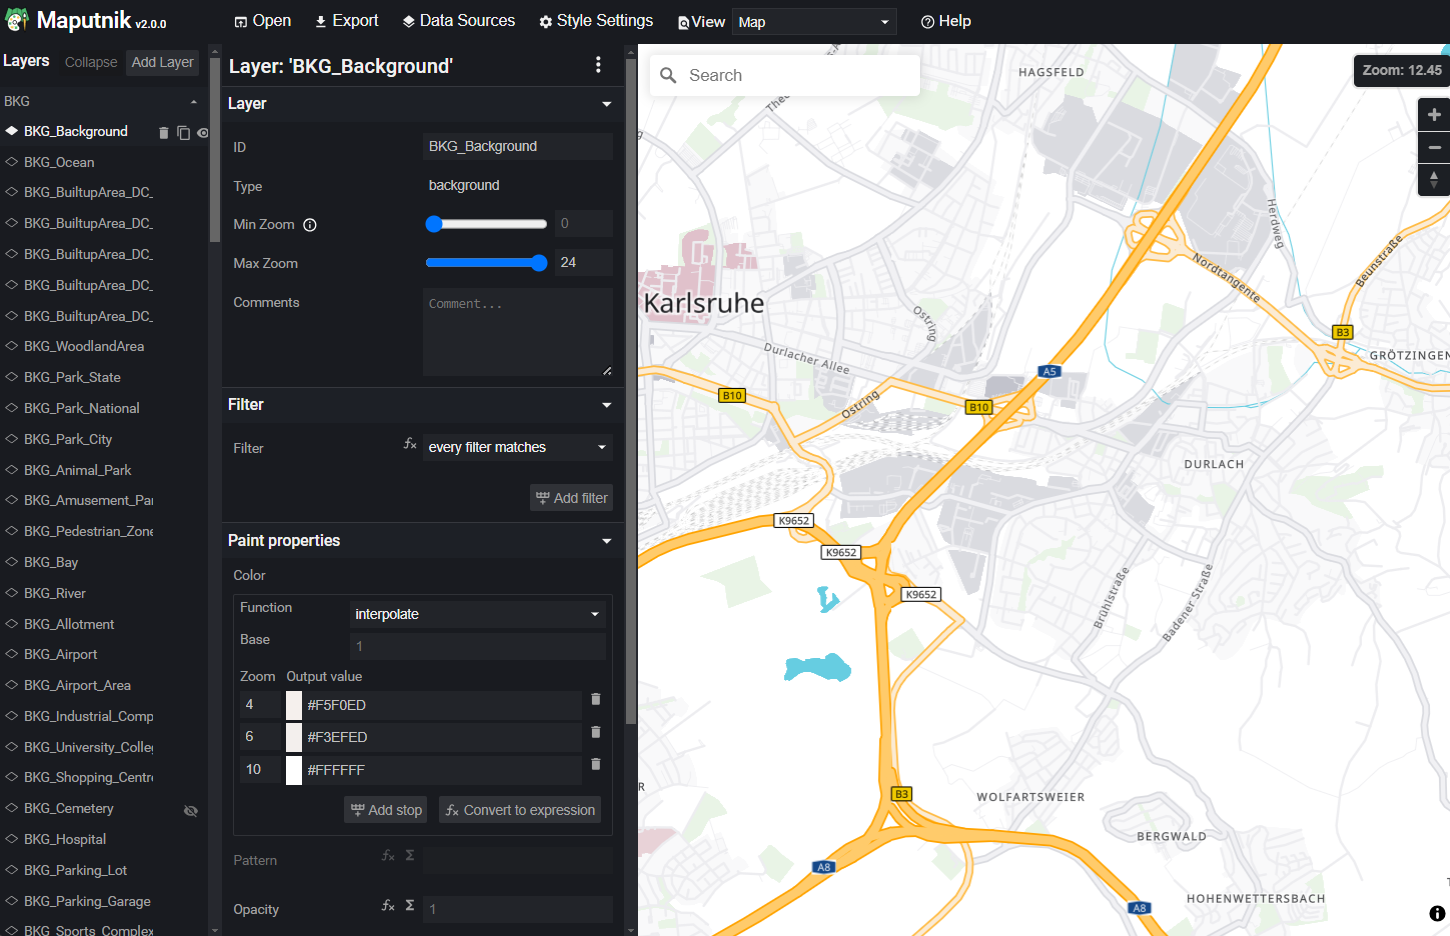
Select your downloaded style with the API keys. Maputnik now shows the PTV Vector Map and its layer configuration:
Customize the style
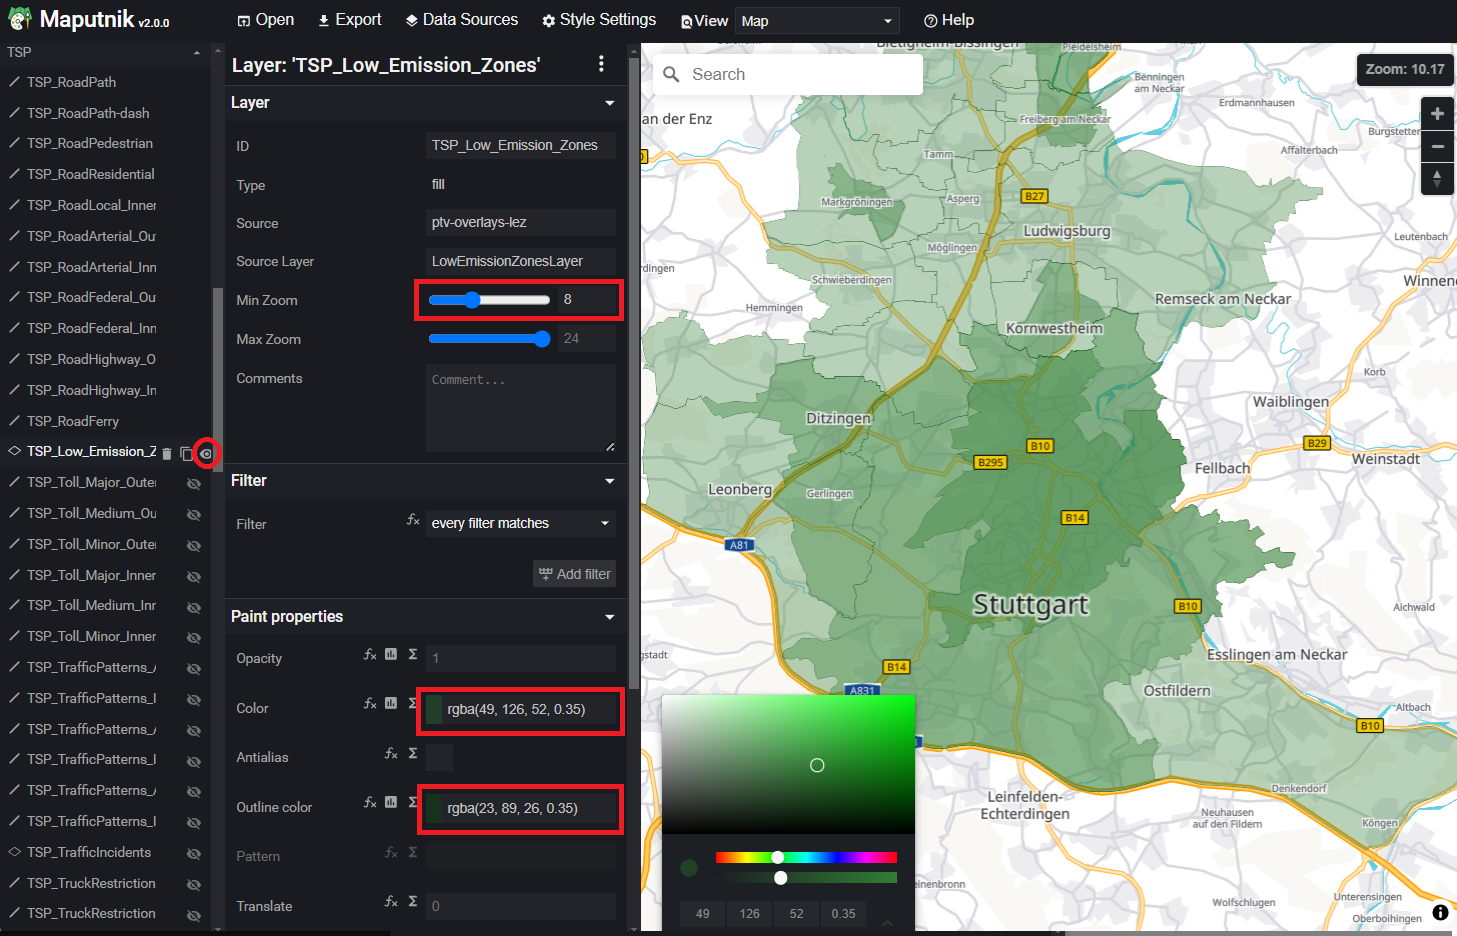
Your can now edit every layer. For example show the low emission zones overlay, change the minimum zoom level or adapt color.
Detailed information about the style structure and features can be found in the maplibre style documentation and the PTV Vector Map style documentation.
Export and integrate the new style
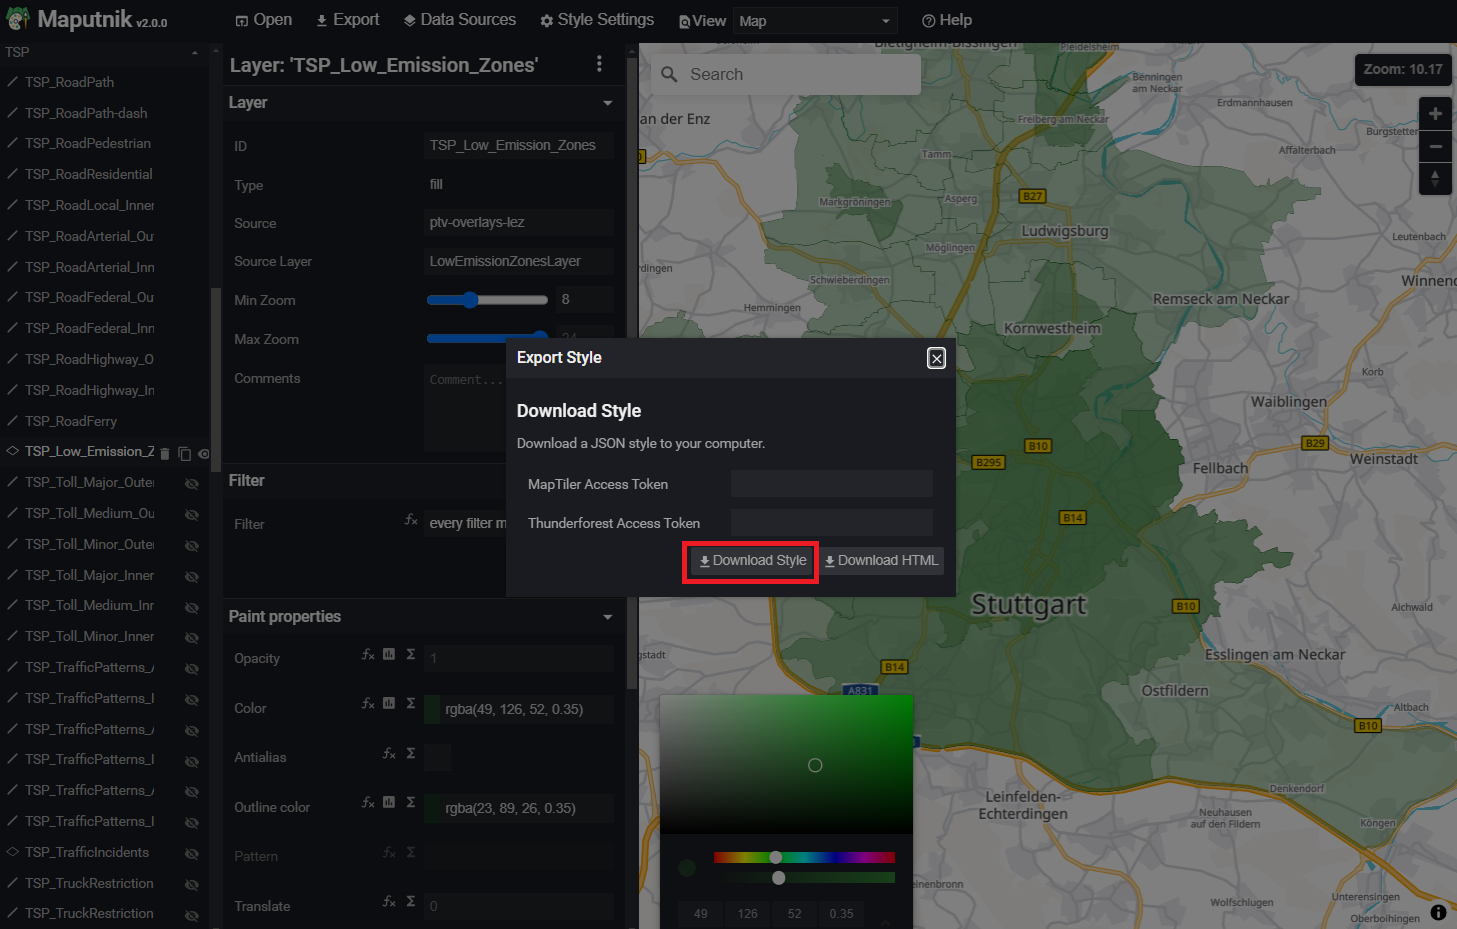
As soon as you are happy with your results you can export by clicking Export -> Download Style:
Now you can integrate your new style into your application.
import { Map } from "react-map-gl/maplibre";
import style from './myCustomStyle.json';

const INITIAL_VIEW_PORT = {
  longitude: 8.4055677,
  latitude: 49.0070036,
  zoom: 12,
  pitch: 0,
  bearing: 0,
};

export const VectorMap = (props) => {

  return (
    <Map
      height="100%"
      width="100%"
      mapStyle={style}
      initialViewState={INITIAL_VIEW_PORT}
    />
  );
};
For productive usage please do not check-in your API key with your style.